
OK, so, today I wanted to check my ping in Valorant. I’ve been having some lag issues lately, and I figured it’s time to see what’s up.
Getting Started
First, I launched Valorant. No surprises there, right? Once the game loaded, I found the settings icon – it’s usually at the top right corner.
Diving into Settings
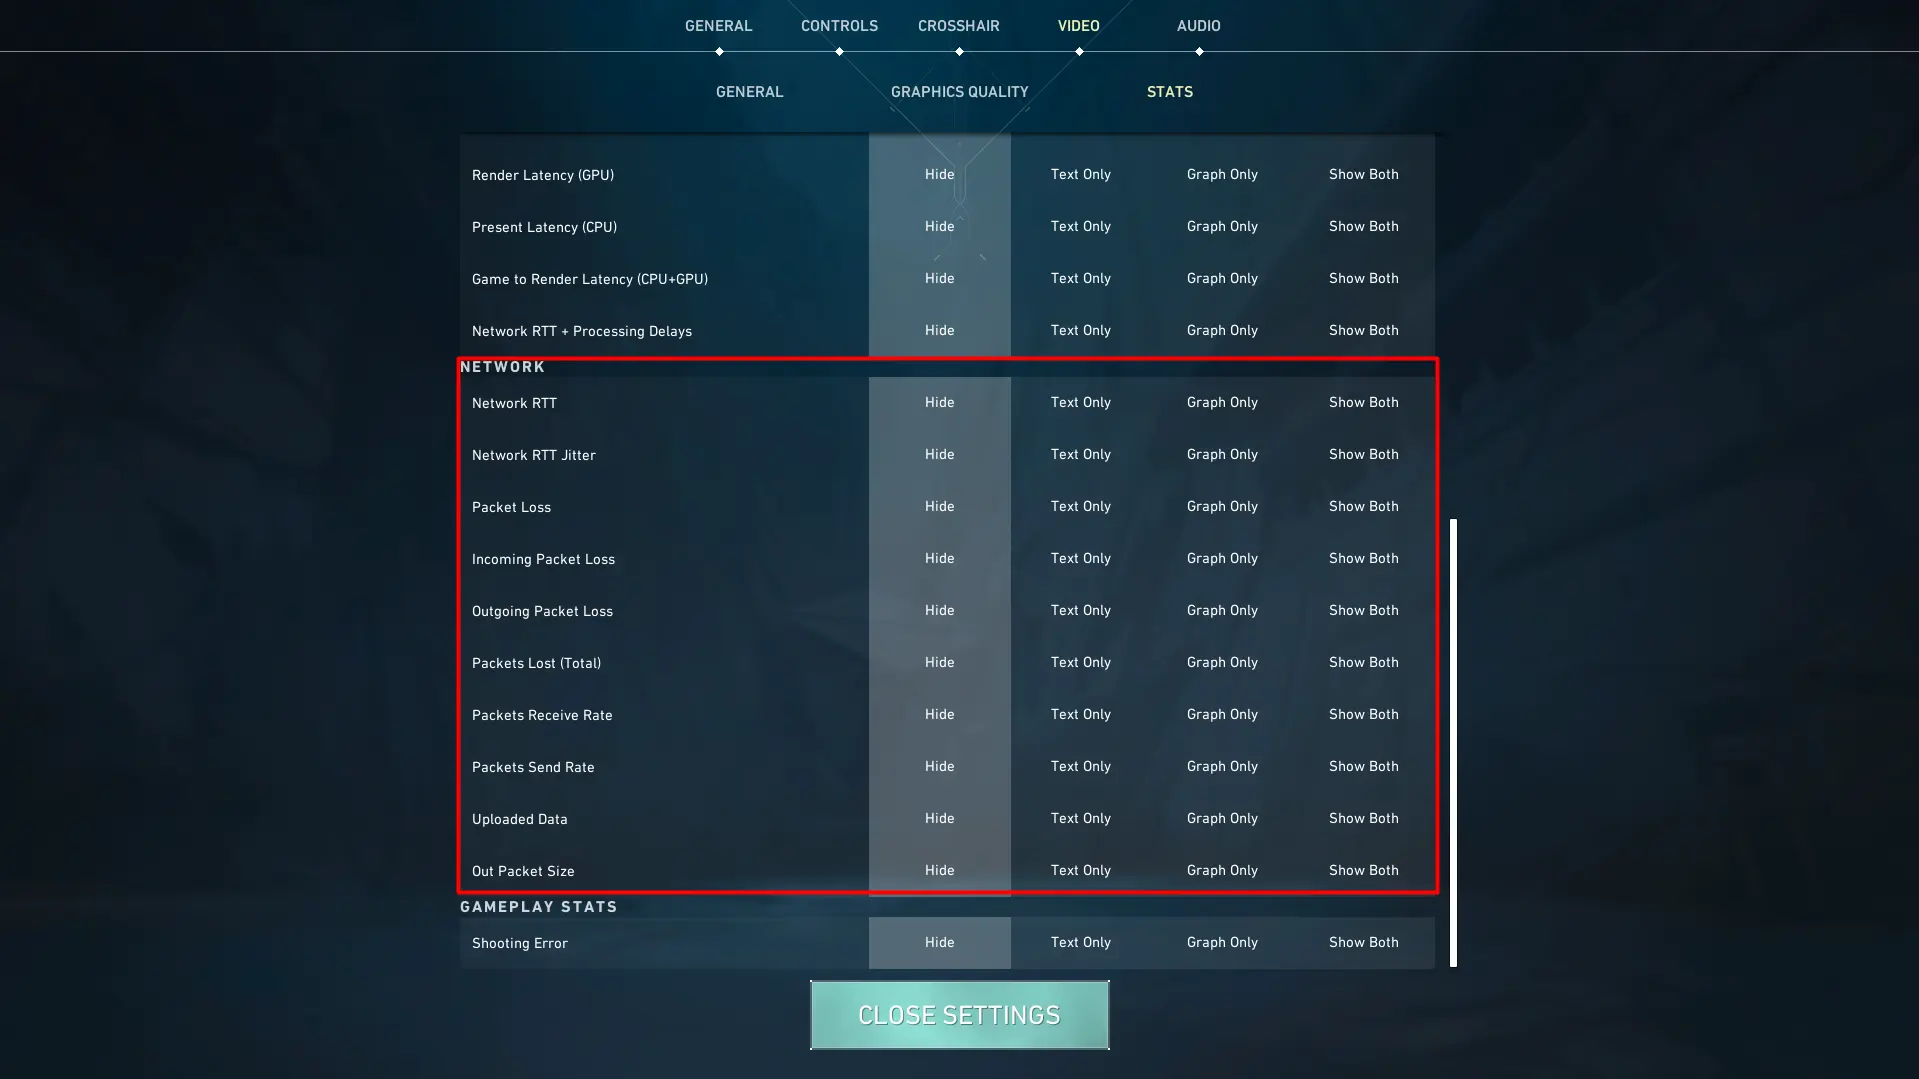
Clicked on that little gear icon and opened the settings menu. Then I headed straight for the ‘Video’ tab. Under ‘Video’, there is ‘Stats’. I saw a bunch of options for displaying performance stats, but the one I needed was ‘Network’ or something like that. Riot changed it a while ago.
Enabling the Ping Display
There was an option to show ‘Packet Loss’ in and out, and round-trip time. I turned them on, making sure I set it to ‘Show Both’.
- Text Only
- Graph Only
- Show Both
You can choose how you want it displayed. I chose ‘Show Both’, which shows the ping as a number and a graph. Pretty neat, huh? Some people prefer just the number or just the graph. There is also an option to show the server tick rate.
Analyzing the Results
After enabling it, I hopped into a quick match to see my ping in action. The ping indicator appeared at the top-right of my screen. Watching it during the game helped me see how stable my connection was.
Tweaking for Better Performance
Seeing my ping fluctuate gave me some ideas. I decided to do a quick check using Command Prompt. Opened it up and typed ping one dot one dot one dot one and pressed enter. This gave me some numbers to compare with another DNS. Then I did ping 8 dot 8 dot 8 dot 8.
Wrapping Up
Overall, it was a pretty straightforward process. Now I can keep an eye on my ping whenever I play, and hopefully, I can work on making it more stable. Anything below 50 ping is okay if you are playing competitively, which I do not. But it is nice to know that I can check my ping and packet loss now. It’s one of those little things that can make a big difference in your gaming experience.


