Alright, today I’m gonna talk about setting up a dedicated server for Palworld. I wanted a server that my friends and I could jump into anytime without one of us always having to be online as the host. So I figured, why not set up a dedicated server?
First off, I needed a machine to host it. I had an old PC lying around that wasn’t doing much, so I decided to use that. It’s not super powerful, but it’s more than enough for a Palworld server. I wiped it clean and installed a fresh copy of Windows Server. It could probably run on Linux too, but I’m more familiar with Windows, so I stuck with that.

Next up was getting the server files. SteamCMD is a tool I used for this. I downloaded it from the Steam website, which was pretty straightforward. After installing SteamCMD, I used it to download the Palworld server files. There’s a specific command you gotta run, something like “app_update 2394010 validate”. That number is the app ID for the Palworld dedicated server. It took a while to download everything, but once it was done, I had all the server files ready to go.
Configuring the server was the next step. There’s a config file where you can set things like the server name, password, max players, and all that jazz. I spent some time tweaking these settings. For example, I set a unique name for my server and added a password so only my friends could join. Also, I messed around with the day-night cycle speed to make the days a bit longer because why not?
- Launch the server.
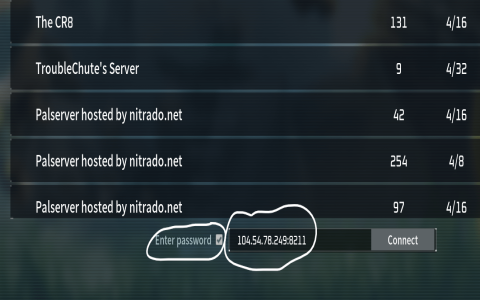
- Go to the game’s main menu.
- Click on “Join Multiplayer Game.”
- Choose the server, enter the password, and hit connect.
Port forwarding was a bit of a headache. Basically, I had to log into my router’s settings and tell it to forward requests on the Palworld port (which is 8211 by default) to the server machine’s IP address. This part might be tricky depending on your router, but there are tons of guides online for how to do it.
Finally, I launched the server. There’s an executable in the server files that starts it up. When I ran it, a command prompt window popped up, showing all the server logs and stuff. At first, it didn’t work because of a firewall issue. I had to go into the Windows Firewall settings and add an exception for the Palworld server. Once I did that, boom, the server was up and running!
To test it, I opened Palworld on my main PC and looked for my server in the server browser. And there it was! I connected, and everything worked perfectly. My friends were able to join too, and we played for hours without any issues. It was a great feeling to have our own little world running 24/7. Although some of my buddies said that the days were too long, I might change it back to default.
So, yeah, that’s how I set up a dedicated server for Palworld. It wasn’t too complicated, but it did require a bit of technical know-how. I am so excited to continue to roam the open world and capture more Pals! If anyone’s thinking of doing the same, just make sure you have a decent machine to host it on and some patience for the setup process. It’s definitely worth it in the end!


